How To Use Psytropy
First Things First
To effectively use Psytropy and gain a real market edge, you need to understand three simple concepts. Let's begin.
HIGHEST PRICE & LOWEST PRICE
Even if you are already familiar with swing highs and lows, please adopt the definitions used here, as they are crucial for an accurate Psytropy analysis.
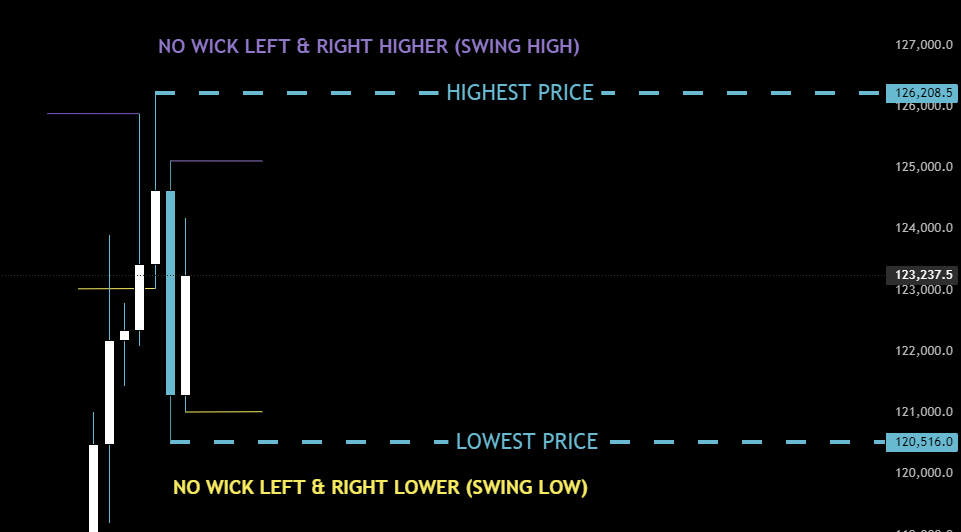
It's quite straightforward. A Swing High is defined by a candle that has no higher price action (including wicks) to its immediate left or right. It's important to note that Swing Highs can occur within larger swings, creating what is known as an internal swing.
The same logic applies to a Swing Low. We define it as a candle with no lower price action to its immediate left or right.
Rule: A Swing Low or Swing High is only confirmed after the next candle has closed.
Bearish Scenario
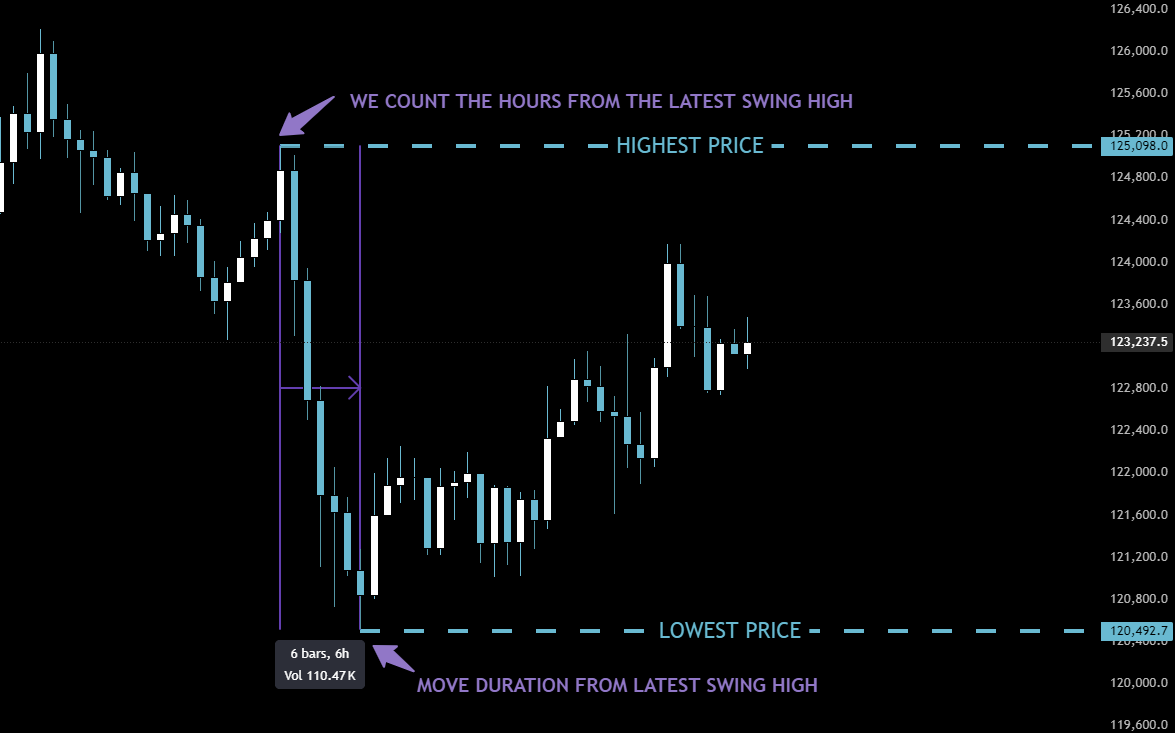
In this bearish example, we shift our focus to the most recent Swing High on the hourly timeframe. The lowest price point from the daily chart remains our target, as the price has not moved below it yet.
The crucial step is to measure the Move Duration—counting the number of hours, days, or weeks—from our point-of-interest Swing High down to the most recent lowest point.
Enter the Highest Price, Lowest Price, and the measured Move Duration into the Psytropy terminal. Select the bearish objective for short entries. Within moments, you will receive high-probability entry zones for your short positions.
Bullish Scenario
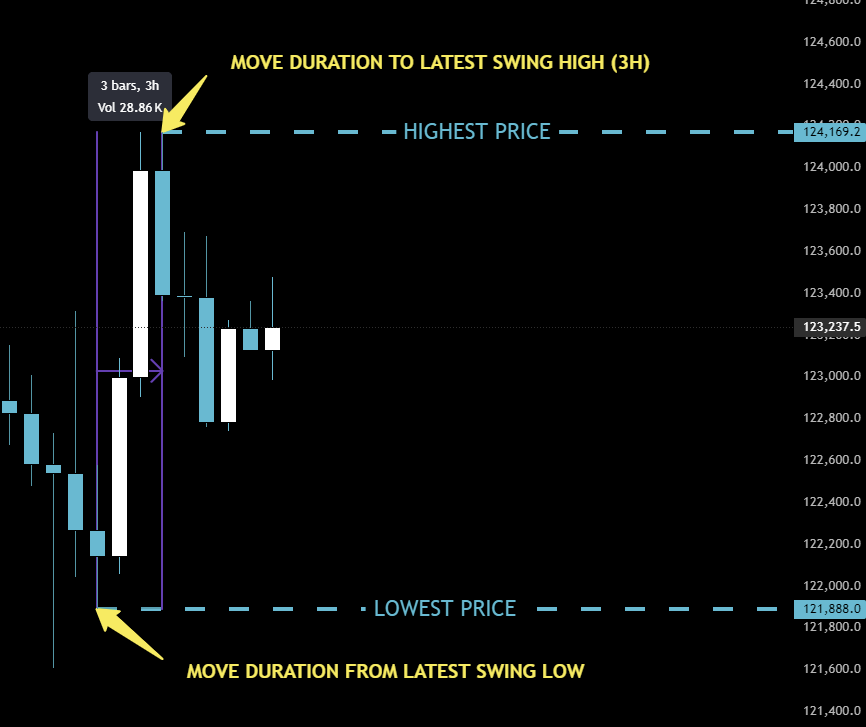
The same logic applies in reverse for a bullish scenario. Here, we focus on the most recent confirmed Swing Low and the latest Swing High.
We measure the duration from the Swing Low (our new lowest price) to the Swing High (our new highest price). Enter these values into Psytropy with a bullish objective to receive potential Long Entry zones.
Psytropy often provides several entry zones. Deciding which one to choose is a key skill. We will cover this in our Tips & Tricks section.